Hey, it’s that time of year again! Time to Get Woodworking! If you or anyone you know has been wanting, waiting, wishing about woodworking, it’s time to step off the curb and join the parade. This week will see plenty of entries from woodworking bloggers and enthusiasts that will try to make the leap a little easier for you or that hesitant someone.
My contribution will be an excerpt from my book, The Perfect Edge, the Ultimate Guide to Sharpening for Woodworkers. As sharpening is a basic woodworking skill, one you really can’t ignore if you want to do good work, I bring you the section called “Basic Kits” starting on page 95:
BASIC KITS
To sharpen anything, you need, at the very least, something to abrade the thing you want to sharpen. That may sound simple but things get complicated from there. For chisels and plane irons the abrasive needs to be flat. And, you need more than one grit-size. Already more complicated. Here are some thoughts about basic sharpening kits.
First, and I’ve said this more than once elsewhere, technique is more important than tools. If you understand the sharpening process — what is required to create a perfect edge — you can use almost any sharpening system with reasonable results. The following applies mostly to chisels and plane irons — flat blades with straight edges — because they seem to need the most attention in a typical furniture shop. More esoteric tools will need specialized gear mentioned in their respective chapters.
To assemble your sharpening kit I recommend an incremental approach, beginning with the least amount of investment. It’s not that I don’t want you to spend money, but I would hate to have you waste any buying stuff you won’t use. Just like anything, there are many ways to sharpen and what works for one woodworker may annoy another. And, different disciplines need different sharpening gear. For instance, if you have no need to sharpen a saw, you’ll have little need for a saw set in your sharpening kit.
SCARY SHARP
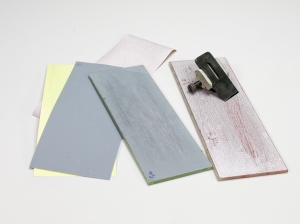
The simplest sharpening kit (often dubbed the Scary Sharp System) is a piece of ¼” thick plate glass (or some other flat tile) and some abrasive honing film (high-grade sandpaper.) I’ve used the basic silicon carbide wet-or-dry sandpaper from the hardware store with good results but it wears out very quickly. The honing films currently available are a superior product for sharpening and are available in a large assortment of grit sizes. I tend to go through the coarsest grits most quickly so I buy more sheets of those when I stock up. The glass I use is large enough that I can apply two strips of honing film on each side: 80µ, 15µ, 5µ and 1µ, but you can use two pieces of glass with abrasive on each side if you prefer (they’re a bit easier to store). The self-stick, PSA-backed (Pressure Sensitive Adhesive) option is handy but you can use a spray adhesive such as 3M’s “Super 77”. That’s all you really need for basic freehand honing of chisels, plane irons, etc. Some other things that come in handy (a square, a marker and scribe) you already have in your shop.
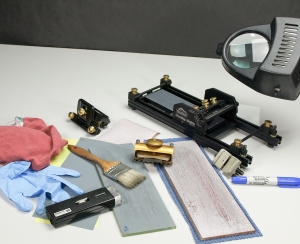
If you are unsure of your technique, a honing guide can help. Honing guides are often useful and sometimes required for getting a perfect edge on an angle-critical tool like a plane iron. As your experience increases, you’ll find yourself gathering some accessories to make things easier and more comfortable. A non-slip mat to keep the glass plate from sliding around, good lighting, a magnifier of some kind (some swing-arm lamps have a large lens in them). Sharpening is messy so I use disposable gloves so I don’t have to scrub my fingers.
A sharpening area can help keep the rest of your shop — and your work — clean. It also makes the routine of sharpening simple, so you’ll be less inclined put it off. Also, a clean and ready sharpening area encourages you to put in the time that it takes to become good at sharpening. A dedicated area can be built to the right height for your own ergonomic comfort and efficiency (usually lower than bench height) and can include storage space for all the gizmos and doodads you’ll collect as you slide farther down sharpening’s slippery slope.
STONES
Many woodworkers use honing film exclusively for sharpening. They swear by it, but if you get tired of buying honing film (the downside of honing film, by the way, is that it gets dull with use and needs to be replaced) you may want to invest in some stones to replace the honing-film system. With stones, you refresh the abrasive surface time and again by flattening it instead of replacing it. Your experience with honing films should give you an idea of what grit-sizes you prefer and you can use that knowledge to shop for stones that approximate those grits.
Stones demand some sort of storage. The type of waterstone that can be soaked full-time needs at the very least a food-storage container, or a fancy, dedicated stone pond that will keep your stone(s) handy and your work area as clean as possible. An apron and a roll of paper towels nearby would not be considered luxuries.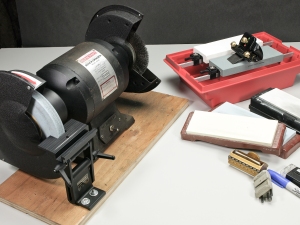
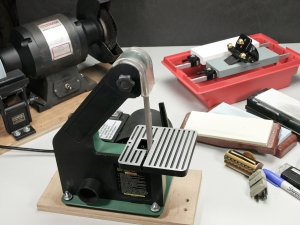
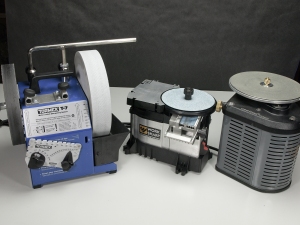
From here, you may want to add some electrical power in the form of a bench grinder or one of the dedicated sharpening machines that I’ve discussed elsewhere. Most resharpening jobs do not need power tools but they do come in handy for all sorts of things, including reshaping the damaged or neglected edge. In and of itself, the addition of a power tool may necessitate a dedicated area in the shop for sharpening — such as that long counter under the window or a cart or bench built just for this purpose. If the grinder has a permanent home on a bench or counter, a drawer under or nearby would be a good place to keep the rest of the sharpening gear so it stays clean and out of harm’s way.
With time and dedication you’ll no doubt find yourself acquiring and adapting all sorts of special purpose doodads for those tools that you, and only you, understand how to sharpen. Your collection will depend entirely on the types of woodworking you do and the tools required for it. A wood carver will have a different sharpening kit compared with a turner’s, etc. All the possibilities let you be creative and open to new ideas. It seems that every woodworking magazine has an article on some nuance of sharpening every few editions. Ask friends or fellow students or club members about their sharpening setups and use all available resources to learn more about your own sharpening needs, then respond accordingly. As I’ve said before, asking others is a great way to get to know another woodworker. Just ask, “How’d you sharpen that?” and you’ll likely make a new friend.
###


Great blog and a fun and informative read Mr. Hock, thanks for that!